Fortunately this isn’t something that you need to do manually. Word 2013 lets you delete all of the information from your document header in one swift act. Our tutorial below will show you how to complete this process and restore the header to its default, empty state.
How to Delete a Header in Word 2013
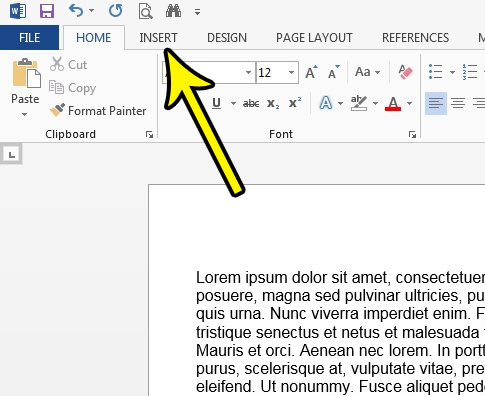
The steps in this article assume that your document currently has information in its header, and that you want to delete all of that information. This will affect every page of your document, as the header is a repeating element that appears on every page. This will not affect any of the content in the body of the document. Step 1: Open your document in Word 2013. Step 2: select the Insert tab at the top of the window.
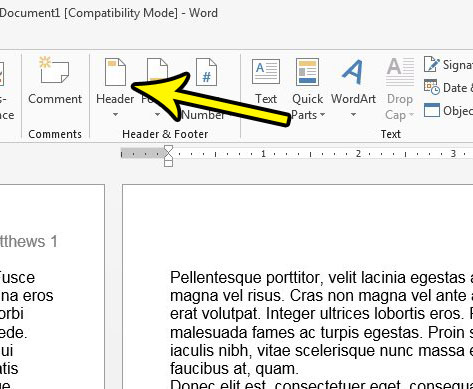
Step 3: Click the Header button in the Header & Footer section of the ribbon.
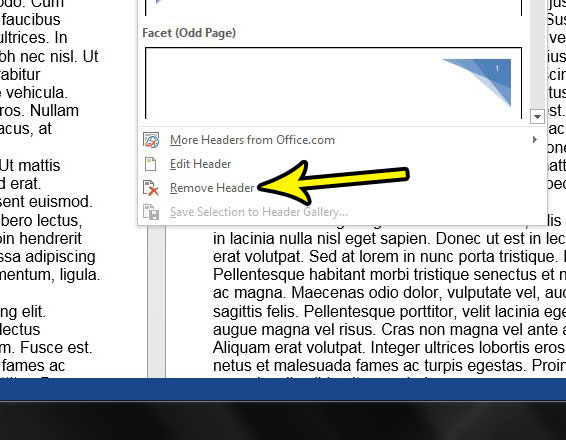
Step 4: Choose the Remove Header option near the bottom of this menu to delete all of the content from the document header.
Is there a selection in your document that has a lot of formatting that you are struggling to remove? Find out how to clear all of the formatting from a selection in Word. You can even use this same method to clear all of the formatting from the entire document, if you wish. He specializes in writing content about iPhones, Android devices, Microsoft Office, and many other popular applications and devices. Read his full bio here.